Configuring Essential Penetration Testing Tools on Kali Linux
Network Configuration Essentials for Kali Linux
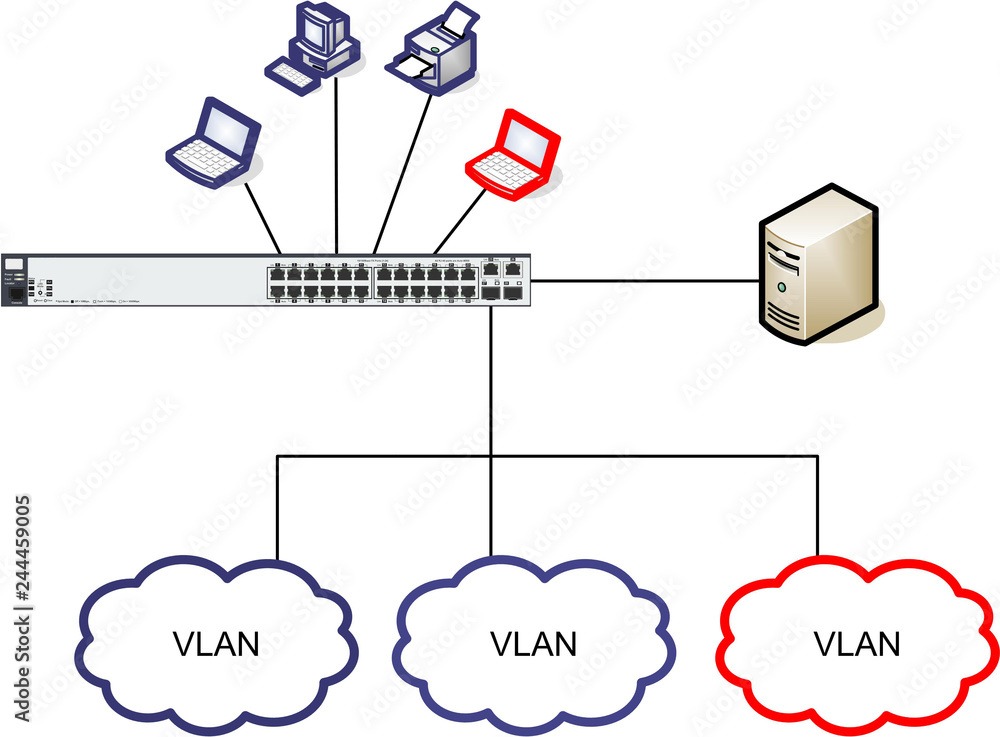
Understand the basics of setting up and troubleshooting network connections in Kali Linux. This section includes configuring wired and wireless networks, assigning static IP addresses, and using diagnostic tools. Additionally, learn about setting up VPN and proxy connections.
Managing user accounts, groups, and setting permissions in Kali Linux is crucial for security and access control. Here’s how you can handle these tasks:
User Management
- Creating Users: Use the
addusercommand to add a new user. For example:
sudo adduser usernameFollow the prompts to set password and additional information.
- Deleting Users: To remove a user, use
deluseroruserdel:
sudo deluser username- Changing User Password: Use
passwdto change a user’s password:
sudo passwd username- Modifying User Information: To change user details (like full name or shell), use
usermod:
sudo usermod -c "New User Name" usernameGroup Management
- Creating Groups: Use
addgroupto create a new group:
sudo addgroup groupname- Adding Users to Groups: Use
usermodto add a user to a group:
sudo usermod -aG groupname username- Listing Groups: Use
getentor view/etc/group:
getent groupPermissions Management
- Understanding Permissions: Each file and directory in Linux has three sets of permissions (read, write, execute) for the owner, group, and others.
- Setting Permissions: Use
chmodto change permissions:
sudo chmod permissions filename/directoryExample: sudo chmod 755 file.txt sets read, write, and execute permissions for the owner, and read and execute permissions for group and others.
- Changing Ownership: Use
chownto change ownership of files and directories:
sudo chown owner:group filename/directoryExample: sudo chown root:root file.txt changes ownership to root user and root group.
Administrative Tasks
- Sudo Access: Users can gain administrative privileges temporarily using
sudo. - Editing
sudoersfile: Usevisudoto editsudoersfile for more fine-grained access control:
sudo visudoThese commands provide the basic framework for managing users, groups, and permissions in Kali Linux, crucial for maintaining security and access control on your system.
Configuring networking in Kali Linux involves setting up network interfaces, assigning IP addresses, configuring DNS settings, and managing network services. Here’s a guide to help you with these tasks:
Network Interfaces
- Viewing Network Interfaces: Use
ifconfigorip ato view current network interfaces:
ifconfigor
ip a- Configuring Network Interfaces: Edit the configuration file
/etc/network/interfacesor useipcommand:
sudo nano /etc/network/interfacesExample configuration for a static IP address (eth0 interface):
   auto eth0
   iface eth0 inet static
       address 192.168.1.100
       netmask 255.255.255.0
gateway 192.168.1.1- Restarting Networking Service: Apply changes with:
sudo systemctl restart networkingIP Address Management
- Assigning IP Address: Use
ifconfigorip addrto assign IP addresses temporarily:
sudo ifconfig eth0 192.168.1.100 netmask 255.255.255.0 up- Persistent IP Address Configuration: Edit
/etc/network/interfacesas shown above for persistent configuration.
DNS Configuration
- Editing DNS Settings: Edit
/etc/resolv.conffor DNS configuration:
sudo nano /etc/resolv.confExample:
   nameserver 8.8.8.8
nameserver 8.8.4.4- Using Network Manager: For dynamic DNS configuration, use Network Manager (
nmcli):
   nmcli device modify eth0 ipv4.method auto
   nmcli device modify eth0 ipv4.dns "8.8.8.8 8.8.4.4"
   nmcli connection up eth0
Network Services
- Checking Service Status: Use
systemctlto check the status of network-related services:
   systemctl status networking
systemctl status NetworkManager- Starting and Stopping Services: Use
systemctlto start, stop, and restart services:
   sudo systemctl start networking
   sudo systemctl stop networking
   sudo systemctl restart networking
Troubleshooting
- Checking Connectivity: Use
pingto check network connectivity:
ping google.com- Checking Routing Tables: Use
ip routeto view and manage routing tables:
ip route showThese steps should help you configure networking on Kali Linux, whether for static or dynamic IP addressing, DNS configuration, or troubleshooting network issues. Adjust configurations based on your network environment and requirements.
Securing Kali Linux involves setting up firewalls, configuring mandatory access controls like SELinux or AppArmor, and ensuring services are hardened against potential security threats. Here’s how you can manage these aspects:
Firewalls (iptables)
- Installing iptables: If not already installed, install
iptables:
   sudo apt update
sudo apt install iptables- Configuring iptables Rules: Define rules in
/etc/iptables/rules.v4(IPv4) and/etc/iptables/rules.v6(IPv6):
Example rules for a basic firewall setup:
   *filter
   :INPUT DROP [0:0]
   :FORWARD DROP [0:0]
   :OUTPUT ACCEPT [0:0]
   -A INPUT -i lo -j ACCEPT
   -A INPUT -m conntrack --ctstate RELATED,ESTABLISHED -j ACCEPT
   -A INPUT -p tcp -m tcp --dport 22 -j ACCEPT  # Allow SSH
   -A INPUT -j DROP
COMMIT- Applying iptables Rules: Apply rules using
iptables-restore:
   sudo iptables-restore < /etc/iptables/rules.v4
   sudo ip6tables-restore < /etc/iptables/rules.v6
SELinux (Security-Enhanced Linux) or AppArmor
- Installing SELinux or AppArmor: Depending on your preference, install either SELinux or AppArmor:
- For SELinux:
sudo apt install selinux-utils selinux-basics - For AppArmor:
sudo apt install apparmor apparmor-utils
- Configuring SELinux or AppArmor Policies: Define and manage policies specific to applications and services. Configuration files are typically found in
/etc/selinux/for SELinux and/etc/apparmor.d/for AppArmor. - Enforcing Policies: Set SELinux mode to enforcing or permissive, or enable AppArmor profiles:
- SELinux:
sudo setenforce enforcing - AppArmor:
sudo aa-enforce /path/to/profile
Securing Services
- Service Hardening: Secure services by:
- Disabling unnecessary services.
- Configuring services to run with minimal privileges (
least privilege principle). - Keeping services and dependencies updated (
patching).
- Logging and Monitoring: Enable logging (
syslog) and monitor logs for suspicious activities. - User Access Control: Ensure proper user access controls (
sudoconfiguration,least privilegeprinciples).
Additional Considerations
- Security Updates: Regularly update your system and applications (
apt update,apt upgrade) to patch security vulnerabilities. - Network Security: Monitor and secure network traffic (
iptables,network monitoring tools). - Auditing and Compliance: Perform security audits and ensure compliance with security standards (
PCI DSS,HIPAA, etc.).
By following these steps, you can enhance the security posture of your Kali Linux system, making it more resilient against potential threats and vulnerabilities. Adjust configurations based on your specific security requirements and environment.
Managing software packages on Kali Linux primarily involves using apt and dpkg for installation, removal, and management tasks. Here’s how you can effectively use these package management tools:
Using apt (Advanced Package Tool)
- Updating Package Lists: Before installing new packages, update the package lists:
sudo apt update- Installing Packages: Use
apt installfollowed by the package name(s):
sudo apt install package_nameExample: sudo apt install nmap
- Removing Packages: Remove packages with
apt remove:
sudo apt remove package_nameExample: sudo apt remove nmap
- Upgrading Packages: Upgrade installed packages to their latest versions:
sudo apt upgrade- Searching for Packages: Search for packages using
apt search:
apt search keywordExample: apt search editor
- Listing Installed Packages: List all installed packages with
apt list:
apt list --installedUsing dpkg (Debian Package Manager)
- Installing a .deb Package: Install a
.debpackage usingdpkg:
sudo dpkg -i package_file.deb- Removing a .deb Package: Remove a
.debpackage:
sudo dpkg -r package_name- Listing Installed Packages: List all installed packages managed by
dpkg:
dpkg --list- Checking Package Information: Display information about a specific package:
dpkg -s package_name- Reconfiguring Packages: Reconfigure an installed package:
sudo dpkg-reconfigure package_nameAdditional Tips
- Dependencies:
aptautomatically handles dependencies when installing or removing packages, whereas withdpkg, you may need to manually resolve dependencies. - Repository Management: Configure additional repositories in
/etc/apt/sources.listor/etc/apt/sources.list.d/for accessing more software packages. - Package Locking: Prevent packages from being upgraded using
apt-mark hold:
sudo apt-mark hold package_nameTo release the hold, use apt-mark unhold.
Using apt is generally recommended for most package management tasks on Kali Linux due to its robust dependency handling and ease of use. However, dpkg provides more granular control for managing individual .deb packages. Choose the tool that best suits your specific needs and preferences when managing software on your system.
Configuring the desktop environment on Kali Linux, whether it’s GNOME, KDE, or another environment, allows you to customize the look, behavior, and functionality of your graphical user interface (GUI). Here’s how you can manage and configure popular desktop environments:
GNOME Desktop Environment
- Installing GNOME (if not already installed):
   sudo apt update
sudo apt install gnome-shell gnome-session- Changing Desktop Background: Right-click on the desktop, select
Change Backgroundto choose wallpapers or set a custom image. - Customizing GNOME Shell: Use GNOME Tweaks for advanced customization:
sudo apt install gnome-tweaks- Adjust themes, fonts, icons, extensions, and shell behavior.
- Adding Extensions: Enhance functionality with GNOME Shell Extensions:
- Install extensions from extensions.gnome.org.
- Managing GNOME Settings: Access and adjust various settings through the GNOME Settings application.
KDE Plasma Desktop Environment
- Installing KDE Plasma (if not already installed):
   sudo apt update
sudo apt install kde-plasma-desktop- Changing Desktop Background: Right-click on the desktop, select
Configure Desktopto set wallpapers or use custom images. - Customizing KDE Plasma: Use System Settings for extensive customization:
kcmshell5 systemsettings5- Adjust themes, fonts, icons, workspace behavior, and effects.
- Adding Widgets: Enhance desktop functionality with Plasma Widgets:
- Right-click on the desktop, select
Add Widgetsto browse and add widgets.
- Managing KDE Settings: Access and modify system and application settings through System Settings.
Other Desktop Environments (XFCE, LXDE, etc.)
- Installing Other Desktop Environments:
- For XFCE:
sudo apt update sudo apt install xfce4 - For LXDE:
sudo apt update sudo apt install lxde
- Customizing and Configuring: Each desktop environment has its own settings manager (e.g.,
xfce4-settings-managerfor XFCE,lxde-settingsfor LXDE) to adjust appearance, behavior, and preferences. - Session Management: Configure default session managers (
lightdm,gdm3, etc.) to start your chosen desktop environment at login.
Additional Tips
- Performance Considerations: Some desktop environments may be lighter on resources (e.g., XFCE, LXDE) compared to GNOME or KDE Plasma, which can be beneficial for older or resource-constrained systems.
- Installing Multiple Desktop Environments: You can install multiple desktop environments on Kali Linux and switch between them at the login screen.
- Troubleshooting: If you encounter issues, check logs (
~/.xsession-errors,/var/log/Xorg.0.log) and community resources for solutions specific to your chosen desktop environment.
Customizing your desktop environment allows you to tailor your Kali Linux experience to suit your workflow and preferences, enhancing productivity and usability in graphical mode.
Setting up and configuring services like SSH, web servers (Apache, Nginx), and database servers (MySQL, PostgreSQL) on Kali Linux involves installing the necessary packages, configuring them, and ensuring they run securely. Here’s a guide on how to set up these services:
SSH (Secure Shell)
- Installing SSH Server:
   sudo apt update
sudo apt install openssh-server- Configuring SSH:
- Edit
/etc/ssh/sshd_configto configure SSH settings:sudo nano /etc/ssh/sshd_config - Adjust settings such as port (default is 22), authentication methods, and access rules.
- Restarting SSH Service:
sudo systemctl restart ssh- Accessing SSH: Use
sshcommand from another machine to connect:
ssh username@hostname_or_ipWeb Servers (Apache or Nginx)
Apache HTTP Server
- Installing Apache:
   sudo apt update
sudo apt install apache2- Configuring Apache:
- Configuration files are located in
/etc/apache2/. - Default web root:
/var/www/html/. - Configure virtual hosts in
/etc/apache2/sites-available/.
- Restarting Apache:
sudo systemctl restart apache2- Testing: Access Apache default page via web browser at
http://localhostorhttp://server_ip.
Nginx
- Installing Nginx:
   sudo apt update
sudo apt install nginx- Configuring Nginx:
- Configuration files are in
/etc/nginx/. - Default web root:
/var/www/html/. - Configure server blocks (virtual hosts) in
/etc/nginx/sites-available/.
- Restarting Nginx:
sudo systemctl restart nginx- Testing: Access Nginx default page via web browser at
http://localhostorhttp://server_ip.
Database Servers (MySQL or PostgreSQL)
MySQL (MariaDB)
- Installing MySQL (MariaDB):
   sudo apt update
sudo apt install mariadb-server- Securing MySQL Installation:
sudo mysql_secure_installationFollow the prompts to set root password, remove insecure defaults, etc.
- Accessing MySQL:
sudo mysql -u root -pPostgreSQL
- Installing PostgreSQL:
   sudo apt update
sudo apt install postgresql postgresql-contrib- Configuring PostgreSQL:
- PostgreSQL uses
pg_hba.conffor authentication settings andpostgresql.conffor server configurations.
- Accessing PostgreSQL:
- Switch to PostgreSQL user:
sudo -i -u postgres - Access PostgreSQL prompt:
psql
Additional Tips
- Firewall Configuration: Adjust firewall rules (using
iptablesorufw) to allow traffic to these services. - SSL/TLS Configuration: Secure web servers with SSL/TLS certificates for HTTPS connections (
Let's Encrypt, self-signed, etc.). - Service Monitoring: Monitor service logs (
/var/log/) for troubleshooting and security auditing.
By setting up and configuring these services on Kali Linux, you can create a robust environment for development, testing, or production use, ensuring they are secure and optimized for your needs. Adjust configurations based on specific requirements and security best practices.
Customizing penetration testing tools like Metasploit, Nmap, Wireshark, and others on Kali Linux involves installing them and configuring them according to your specific needs. Here’s how you can manage these tools:
Metasploit
- Installing Metasploit:
   sudo apt update
sudo apt install metasploit-framework- Starting Metasploit:
   sudo msfdb init
   sudo service postgresql start
sudo msfconsole- Customizing Metasploit:
- Update Metasploit modules:
sudo msfupdate - Configure settings in
/etc/msf4/directory. - Customize modules and exploits based on requirements.
Nmap
- Installing Nmap:
   sudo apt update
sudo apt install nmap- Using Nmap:
- Scan a target:
sudo nmap target_ip_or_domain - Explore Nmap options and scripts (
nmap --helpand/usr/share/nmap/scripts/).
- Customizing Nmap:
- Create custom Nmap scripts or modify existing ones in
/usr/share/nmap/scripts/. - Adjust Nmap scan options and output formats.
Wireshark
- Installing Wireshark:
   sudo apt update
sudo apt install wireshark- Starting Wireshark (requires root privileges for capturing):
sudo wireshark- Customizing Wireshark:
- Configure capture options, filters, and display preferences.
- Install additional dissectors or plugins from Wireshark’s official repository.
Additional Tools
- Burp Suite:
- Download the installer from the official website.
- Install and configure as per the documentation.
- Aircrack-ng:
   sudo apt update
sudo apt install aircrack-ng- Use for wireless network penetration testing.
- Other Tools:
- Explore Kali Linux’s repositories (
apt search) for additional penetration testing tools. - Customize configurations and integrate tools as needed for specific tasks.
Maintenance and Updates
- Regular Updates: Keep tools updated with
apt updateandapt upgrade. - Custom Scripts: Develop and integrate custom scripts or configurations to streamline workflow and automate tasks.
By customizing these penetration testing tools on Kali Linux, you can enhance your capabilities in security assessment and testing. Always ensure that you are using these tools responsibly and within legal boundaries.
Managing file systems on Kali Linux involves tasks like mounting drives, managing partitions, and configuring different file systems. Here’s how you can handle these tasks effectively:
Mounting Drives
- Identifying Drives:
- Use
lsblkorfdisk -lto list available drives and partitions:lsblk sudo fdisk -l
- Mounting a Drive:
- Create a mount point (if it doesn’t exist):
sudo mkdir /mnt/drive_name - Mount the drive (replace
/dev/sdXandmount_pointwith actual device and mount point):sudo mount /dev/sdX /mnt/drive_name
- Automount at Boot:
- Add an entry in
/etc/fstabfor automatic mounting:sudo nano /etc/fstab
Example entry:/dev/sdX /mnt/drive_name ext4 defaults 0 0
- Unmounting a Drive:
sudo umount /mnt/drive_nameManaging Partitions
- Creating Partitions:
- Use
fdisk,parted, orgpartedfor partitioning:sudo fdisk /dev/sdX
- Formatting Partitions:
- Format partitions with
mkfs(replaceext4with desired file system type):sudo mkfs -t ext4 /dev/sdX1
- Resizing Partitions:
- Use
resize2fsfor ext file systems:sudo resize2fs /dev/sdX1
Configuring File Systems
- Checking File System Types:
- Use
blkidto check file system types:sudo blkid /dev/sdX
- Repairing File Systems:
- Repair ext file systems with
fsck:sudo fsck /dev/sdX1
- Changing File System Labels:
- Use
e2labelfor ext file systems:sudo e2label /dev/sdX1 new_label
Additional Tips
- Backup: Always backup data before making significant changes to partitions or file systems.
- Security: Set appropriate permissions (
chmod,chown) after mounting drives to ensure security. - Monitoring: Monitor disk usage and health (
smartctl,df -h) regularly.
Managing file systems on Kali Linux allows you to optimize storage, manage data effectively, and ensure reliable performance for your penetration testing and security assessment tasks. Adjust configurations based on specific needs and system requirements.
Configuring logging and monitoring tools on Kali Linux is crucial for tracking system and network activities, identifying security incidents, and maintaining system health. Here’s how you can set up logging and monitoring effectively:
Logging
- System Logs (
syslog)
- Viewing Logs: Use
cat,less, ortailcommands to view logs in/var/log/directory:sudo tail -f /var/log/syslog - Configuring Log Rotation: Configure log rotation settings in
/etc/logrotate.confor individual configuration files in/etc/logrotate.d/. - Customizing Logging: Edit
/etc/rsyslog.confto customize syslog behavior:sudo nano /etc/rsyslog.conf
- Application-Specific Logs
- Apache Logs: Located in
/var/log/apache2/. - Nginx Logs: Located in
/var/log/nginx/. - Database Logs (e.g., MySQL, PostgreSQL): Located in their respective directories or as specified in their configuration files (
my.cnf,postgresql.conf).
Monitoring Tools
- Nagios
- Installation:
sudo apt update sudo apt install nagios3 - Configuration: Edit configuration files in
/etc/nagios3/to define hosts, services, and alerts. - Accessing Web Interface: Access Nagios web interface at
http://localhost/nagios3/after setup.
- Zabbix
- Installation:
sudo apt update sudo apt install zabbix-server-mysql zabbix-frontend-php zabbix-agent - Configuration: Configure MySQL database, Zabbix server settings in
/etc/zabbix/, and frontend settings in/etc/apache2/conf-enabled/zabbix.conf. - Accessing Web Interface: Access Zabbix web interface at
http://localhost/zabbix/after completing setup.
Security Monitoring
- Security Information and Event Management (SIEM)
- Consider using open-source SIEM solutions like Elastic Stack (formerly ELK Stack) or Security Onion for centralized logging and security monitoring.
- Installation: Detailed installation instructions are available on their respective websites:
- Configuration: Configure data sources, rules, and alerts to monitor security events effectively.
Additional Tips
- Log Analysis: Use tools like
grep,awk,sed, andlogwatchto analyze logs and extract relevant information. - Alerting: Configure email alerts (
mail,sendmail) or integrate with third-party services for alert notifications. - Regular Review: Regularly review logs and monitor system metrics to detect anomalies or suspicious activities.
By implementing logging and monitoring tools on Kali Linux, you can proactively manage and secure your systems, ensuring compliance with security policies and quick response to incidents. Customize configurations based on specific requirements and integrate additional tools as needed for comprehensive monitoring.